Paper bowl forming machines support high-speed production, but even reliable equipment can develop faults during daily operation. A loose sensor, uneven paper feeding, or unstable heating may quickly affect bowl shape, sealing quality, and production speed. This guide, “China Top 10 How to Solve Common Paper Bowl Machine Faults?”, introduces practical methods based on operating experience, maintenance principles, and common factory conditions.
The central question is: How to solve common faults in paper bowl forming machines? Effective troubleshooting begins with careful observation. Check the paper roll, forming mold, heater temperature, air pressure, and machine lubrication before replacing expensive parts. A bowl with a weak rim may indicate poor heating or incorrect pressure. Wrinkles can come from paper moisture, misalignment, or a worn forming tool. Small details matter.
Safety comes first.
Experienced technicians also record fault frequency, production speed, and material specifications. These records help separate mechanical problems from paper-quality issues. However, no checklist is perfect. A machine may appear normal during inspection, then fail after continuous operation. That is why gradual testing, clean components, and verified adjustments remain important. Operators should follow the manufacturer’s manual and use qualified service support for electrical or control-system faults. With disciplined inspection and honest analysis, manufacturers can reduce downtime, protect product consistency, and improve the long-term reliability of paper bowl production equipment.
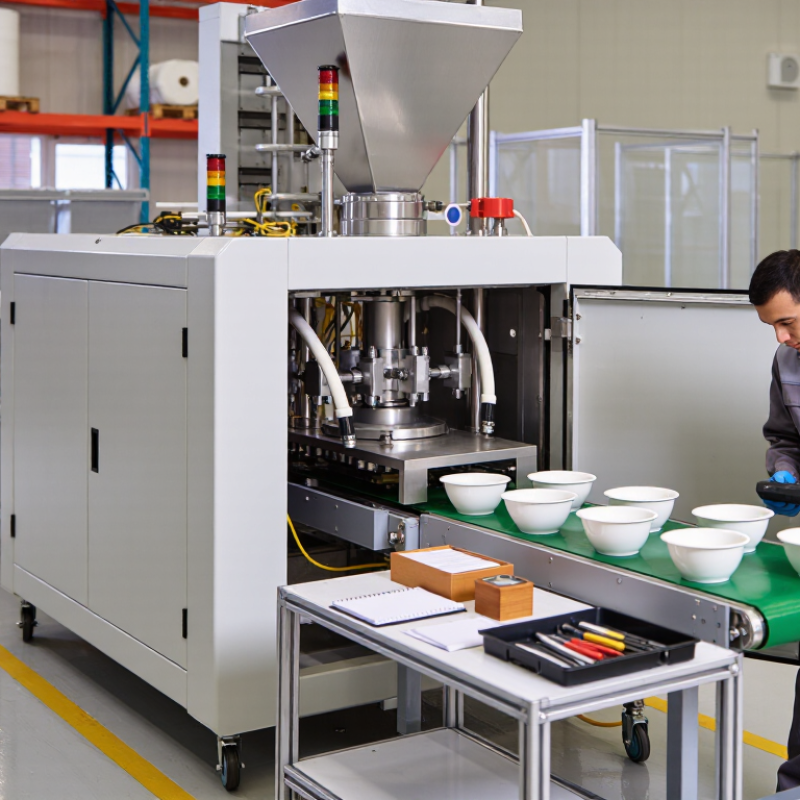
Many bowl-machine faults begin before production.
Check the paperboard, not only the machine. A practical operating window is 170–350 g/m², with moisture between 6% and 8%. ISO 536:2019 defines the grammage test method. ISO 638-1:2022 specifies oven-dry moisture measurement. Use both methods consistently. A handheld meter can drift. We once blamed the heater, but uneven moisture caused the curling.
Condition samples before testing. TAPPI T 402 recommends 23 ± 1°C and 50 ± 2% relative humidity. Allow enough time for the sheets to stabilize. A cold stack may show false readings.
Check five points across each sheet. Record the center and edges separately. Edges often dry first.
Grain direction matters.
The bowl wall should usually form with the grain running around the circumference, depending on the forming design. Cross-grain feeding can produce cracked rims, loose side seams, or unstable flanges.
Confirm direction from the mill sheet, then mark a sheet with an arrow. Feed ten test blanks slowly. Watch the crease, rim, and bottom curl.
If defects appear only on one side, inspect grain alignment and moisture distribution before changing pressure or temperature.
These checks are simple, but operators sometimes skip them during urgent orders. That shortcut can create a fault the machine did not cause.
China Top 10: How to Solve Common Paper Bowl Machine Faults?
A 0.2 mm check can expose faults before rejected bowls accumulate.
During feeding, measure the paper blank’s side clearance at three points. Uneven gaps often indicate a worn guide, loose fastener, or inconsistent fan pressure. I have seen operators increase pressure first. That usually hides the real problem.
Keep the blank centered, and inspect the stack edge every 30 minutes. PMMI’s 2024 Packaging Compass identifies maintenance capability and workforce skills as major packaging priorities, supporting routine, recorded checks rather than guesswork.
Curling faults need equal attention.
Measure the rim height around the bowl, keeping the variation within 0.2 mm where the process allows. A cold forming tool, uneven heat, or damp paper can create a low section. Check moisture records and temperature readings together.
Misalignment is easier to diagnose with a transparent reference sheet placed over the forming station. If the printed center shifts beyond 0.2 mm, inspect servo timing, die position, and web tension.
Smithers’ paper packaging market analysis continues to link quality demands with tighter converting control, but real machines remain less perfect. Tiny drift matters. Record the first faulty bowl, not only the final batch count.
Paper bowl forming and knurling faults usually appear as uneven rims, loose curls, wrinkles, or small leaks. These defects often come from unbalanced pressure, excessive speed, or worn forming dies. An experienced operator checks the bowl wall, rim height, and knurling marks before changing settings.
Start by reducing forming pressure slightly when the rim looks crushed or split. Increase pressure gradually when the curl remains open or feels weak. Too much pressure can leave sharp marks on the paper. Too little pressure creates unstable shapes. Keep the adjustment small, then inspect several bowls rather than one sample.
Speed also changes the result. A fast cycle may cause incomplete forming because the paper has less time to follow the die. Lower the speed when wrinkles appear near the base or knurling looks shallow. If the paper stretches unevenly, check die alignment and clearance. A dirty or worn die can imitate a pressure problem. Clean the contact surfaces and measure the die gap before replacing parts. I have seen operators chase pressure settings when the real issue was a slightly tilted die. That mistake wastes material. Record each adjustment, including paper weight, temperature, and production speed. Some settings still need refinement after testing, especially when paper moisture changes during a shift.
Paper bowl leaks often begin at the rim, but the visible hole may hide a process imbalance. In production checks, I measure the sealing jaw with an independent calibrated thermometer, not only the machine display. The target range is usually 150–200°C, yet the correct setting depends on coating, paper thickness, speed, and pressure. Too little heat leaves an open seal. Excessive heat can wrinkle the coating or weaken the paper. Keep the jaw clean. A thin film of adhesive, dust, or melted coating changes contact pressure. Check the temperature at several points across the jaw. Cold corners are common and easy to miss.
If the rim passes inspection, test the bottom bond separately. A loose base often results from uneven forming pressure, poor alignment, or insufficient heating during bonding. Cut several bowls and inspect the bond line under bright light. Look for gaps, lifted fibers, and shiny areas where coating has shifted. Material moisture also matters; damp paper may seal irregularly and distort during forming. Reduce machine speed temporarily, then compare leakage results after each adjustment. Do not change heat, pressure, and dwell time together. You will lose the cause. I once blamed temperature, but worn tooling created the real leak pattern. The lesson was uncomfortable. Record every setting, sample time, and defect location. Operators may notice patterns that a quick spreadsheet misses.
Resolve leaks by checking the 150–200°C sealing range, coating condition, and bottom bonding temperature. These are typical starting ranges; final settings should be verified against the paper, coating, and adhesive specifications.
Quick troubleshooting guide: Low sealing temperature may cause weak seals and leaks, while excessive heat can damage the coating or deform the bowl. Check temperature uniformity, coating integrity, pressure, dwell time, and bottom bonding alignment.
Paper bowl faults often begin with small changes in pressure, temperature, or alignment. The most visible problems include leaking bottoms, loose rims, wrinkles, poor forming, and uneven stacking. Feeding jams, sensor errors, overheating, weak bonding, and sudden electrical trips also stop production.
A practical leak test takes only 30 minutes. Fill a sample batch with water and inspect each bowl after five, fifteen, and thirty minutes. Mark the exact leak position. A bottom leak may indicate poor heating, damaged tooling, or unstable pressure. A side leak can reveal incorrect paper alignment or weak sealing. Do not adjust several settings together. You may lose the real cause.
Sensor calibration deserves equal attention. Clean dust from photoelectric sensors and check their detection distance before each shift. Compare the machine reading with a physical sample. Small errors can create large scrap volumes. In one production check, a misaligned sensor caused repeated empty cycles. The operator blamed the paper first. That assumption was wrong.
Inspect heaters, molds, belts, pneumatic lines, and fasteners every week. Lubricate approved moving points and replace worn parts early. Keep a fault log with time, material batch, temperature, and corrective action. It may seem tedious. It exposes patterns. Yet maintenance records are sometimes incomplete, and that weakness needs honest review.
Measure the paper blank’s side clearance at three points. Uneven gaps may indicate worn guides, loose fasteners, or uneven air pressure. Keep the blank centered. Inspect the stack edge every 30 minutes. Increasing pressure first can hide the real cause.
Curling may result from cold tools, uneven heating, or damp paper. Measure rim height around the bowl. Keep variation within 0.2 mm when practical. Compare moisture records with temperature readings. Small drift matters.
Place a transparent reference sheet over the forming station. Check whether the printed center shifts beyond 0.2 mm. Then inspect timing, die position, and web tension. Record the first faulty bowl, not only the final quantity.
Many sealing processes use approximately 150–200°C. The correct setting depends on coating, paper thickness, speed, and pressure. Measure the sealing jaw with an independent calibrated thermometer. Check several points across the jaw. Cold corners are easy to miss.
The bottom bond may be weak. Cut several bowls and inspect the bond line under bright light. Look for gaps, lifted fibers, or shiny coating shifts. Uneven forming pressure, poor alignment, damp paper, or damaged tooling may contribute.
Fill a sample batch with water. Inspect each bowl after five, fifteen, and thirty minutes. Mark the exact leak location. A bottom leak suggests heating, tooling, or pressure problems. A side leak may indicate poor alignment or weak sealing.
Clean photoelectric sensors before each shift. Check their detection distance and compare readings with a physical sample. A small sensor error can create repeated empty cycles. Blaming the paper first may be wrong.
Inspect heaters, molds, belts, pneumatic lines, and fasteners weekly. Lubricate only approved moving points. Replace worn parts early. Keep records of time, material batch, temperature, defects, and corrections. Records can be incomplete. Review them honestly.
How to solve common faults in paper bowl forming machines begins with controlling the raw material and production conditions. Use paperboard within the recommended 170–350 g/m² range, maintain moisture at 6–8%, and confirm that the grain direction is suitable for forming. Feeding problems, curling, and material misalignment can often be identified through careful 0.2 mm inspections of guides, gaps, and positioning. Accurate sensor settings and stable material movement are essential for consistent results.
Forming and knurling defects should be corrected by adjusting pressure, machine speed, and die alignment rather than making random changes. If leakage occurs, inspect the 150–200°C sealing temperature, coating quality, and bottom bonding pressure. Regular 30-minute leak tests can reveal weak seals before large-scale production continues. Combining sensor calibration with scheduled cleaning, lubrication, and preventive maintenance helps reduce scrap, extend machine reliability, and maintain stable bowl quality.

Jinli Machinery